Hello, World! - with cardano-cli
Covered in this tutorial
- Interact with a validator on the
Previewnetwork; - Using cardano-cli (opens in a new tab) and cardano-node (opens in a new tab);
- Getting test funds from the Cardano Faucet (opens in a new tab);
- Using web explorers such as CardanoScan (opens in a new tab).
Pre-requisites
We assume that you have followed the Hello, World!'s First steps and thus, have Aiken installed an ready-to-use. We will also use cardano-cli (opens in a new tab), which is a command-line tool to interact with a running cardano-node (opens in a new tab), and we'll assume you have installed both tools so you have a cardano-node for the Preview network up and running locally, and cardano-cli is in your PATH.
cardano-cli and cardano-node are usually packaged together and installed when installing a cardano-node.
The details of the installation process is beyond the scope of that tutorial, please refer to the Developer portal (opens in a new tab) documentation for the details.
We'll also make use of another command-line tool, cardano-address (opens in a new tab), which you will need to install.
Getting funds
For this tutorial, we will use the validator we built in First steps. Yet, before moving one, we'll need some funds, and a public/private key pair to hold them. We can generate a private key and an address on the command-line:
cardano-cli address key-gen --verification-key-file me.vk --signing-key-file me.skThis will create two files, me.vk and me.sk, containing respectively the public and private keys we'll use in this tutorial.
From these keys we need to derive an address in bech32 format that will be stored in me.addr:
cardano-cli conway address build --testnet-magic 2 --payment-verification-key-file me.vk | tee me.addrThis should output some address similar to:
addr_test1vr69qqlwgw7jty8m2wqvyxytnntufxhcjjur44rqd3t4hfgfq2ne0Now, we can head to the Cardano faucet (opens in a new tab) to get some funds on the Preview network to our newly created address (inside me.addr).
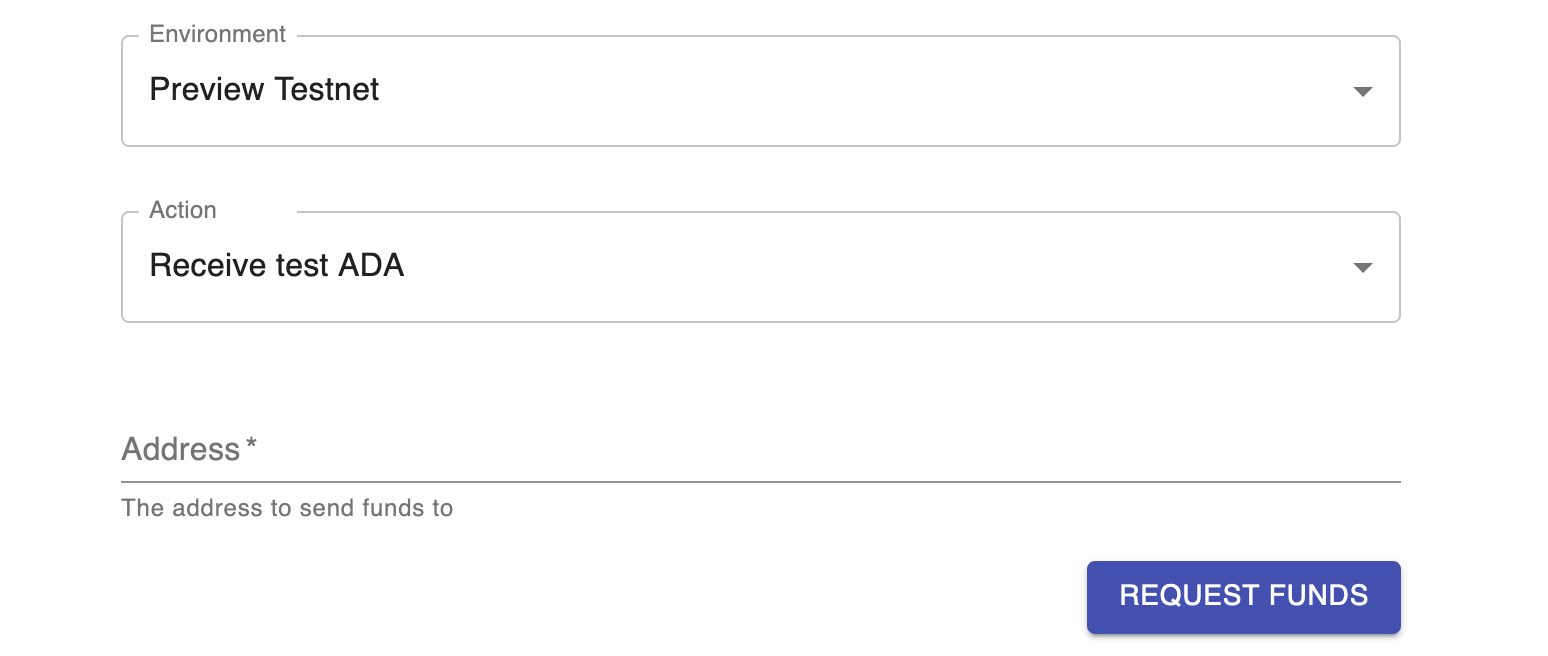
👉 Make sure to select "Preview Testnet" as network.
After successful request, some funds should have been sent to our address and we should have some UTxO available. We can check this on the command-line:
cardano-cli conway query utxo --address $(cat me.addr) --testnet-magic 2 --socket-path node.socket
2178565983a3125c608f7dea381d5b70d064be6b21879de86d4765e8ad3361f1     0        10000000 lovelace + TxOutDatumNone
assuming a cardano-node is started and exposing a local socket at path node.socket.
Using the contract
Now that we have some funds, we can lock them in our newly created contract. We'll use cardano-cli (opens in a new tab) to construct, sign, and submit our transaction to our locally running cardano-node (opens in a new tab).
Setup
First, we'll generate a script file in a format cardano-cli (opens in a new tab) can understand using aiken blueprint command:
aiken blueprint convert > hello.scriptThe compiledCode field in the blueprint file plutus.json cannot be used as-is because the cardano-cli uses a CBOR-in-CBOR encoding wrapped in a simple TextEnvelope JSON file. aiken blueprint convert correctly encodes the script.
From the hello.script file we can compute the script address we'll use to lock:
cardano-cli address build --testnet-magic 2 --payment-script-file hello.script | tee hello.addrThis should output an address that looks like addr_test1wqd988jgwwa5kjc2q4e03rrnrvqvlwz6c7wlyazymhd87mc2x3pjs.
Locking funds into the contract
Now that we can read our validator, we can make our first transaction to lock funds into the contract. The datum must match the representation expected by the validator (and as specified in the blueprint), so this is a constructor with a single field that is a byte array.
The datum must contain the public key hash of the key that's authorized to unlock the contract. We can compute this public key hash as:
cardano-cli conway address build --testnet-magic 2 --payment-verification-key-file test.vk \
   | cardano-address address inspect \
   | jq -r .spending_key_hash \
   | tee me.hash
The file me.hash should contain the hash represented as an hexadecimal string, eg. f45003ee43bd2590fb5380c2188b9cd7c49af894b83ad4606c575ba5.
We can now create the datum JSON file that respects the datum schema from the blueprint, usign the popular jq (opens in a new tab) tool:
jq -c '{constructor:0,fields:[{bytes:.}]}' < me.hash
{"constructor":0,"fields":[{"bytes":"f45003ee43bd2590fb5380c2188b9cd7c49af894b83ad4606c575ba5"}]}
We then proceed to building the transaction:
cardano-cli conway transaction build \
      --tx-in 2178565983a3125c608f7dea381d5b70d064be6b21879de86d4765e8ad3361f1#0 \
      --tx-out $(cat hello.addr)+1100000 \
      --tx-out-inline-datum-file datum.json \
      --change-address $(cat me.addr) \
      --socket-path node.socket --testnet-magic 2 \
      --out-file tx.lock.raw
Note that every UTxO requires a minimum Ada value to prevent users from abusing storage capabilities offered by the system. The 1100000 locked value in the output comes from running the command with a lower value (typically 1000000) and getting an error telling us what's the minimum Ada value to set.
And we can sign it:
cardano-cli conway transaction sign --tx-file tx.lock.raw --out-file tx.lock.signed --signing-key-file test.skBefore submitting the transaction, it's a good idea to inspect and double-check it:
cardano-cli debug transaction view --tx-file tx.signed
{
    "auxiliary scripts": null,
    "certificates": null,
    "collateral inputs": [],
    "currentTreasuryValue": null,
    "era": "Conway",
    "fee": "172145 Lovelace",
    "governance actions": [],
    "inputs": [
        "2842d9914aa07933fee6ac539be51ed19aa8f4d65473bf1e7afc30ba16536f79#1"
    ],
    "metadata": null,
    "mint": null,
    "outputs": [
        {
            "address": "addr_test1wqd988jgwwa5kjc2q4e03rrnrvqvlwz6c7wlyazymhd87mc2x3pjs",
            "address era": "Shelley",
            "amount": {
                "lovelace": 1100000
            },
            "datum": {
                "constructor": 0,
                "fields": [
                    {
                        "bytes": "f45003ee43bd2590fb5380c2188b9cd7c49af894b83ad4606c575ba5"
                    }
                ]
            },
            "network": "Testnet",
            "payment credential script hash": "1a539e4873bb4b4b0a0572f88c731b00cfb85ac79df27444ddda7f6f",
            "reference script": null,
            "stake reference": null
        },
        {
            "address": "addr_test1vpf26vappzgz5zvjv362pzaag27c4dg4tu7qq7n07e686dsy5669m",
            "address era": "Shelley",
            "amount": {
                "lovelace": 40624362
            },
            "network": "Testnet",
            "payment credential key hash": "52ad33a108902a09926474a08bbd42bd8ab5155f3c007a6ff6747d36",
            "reference script": null,
            "stake reference": null
        }
    ],
    "redeemers": [],
    "reference inputs": [],
    "required signers (payment key hashes needed for scripts)": null,
    "return collateral": null,
    "total collateral": null,
    "treasuryDonation": 0,
    "update proposal": null,
    "validity range": {
        "lower bound": null,
        "upper bound": null
    },
    "voters": {},
    "withdrawals": null,
    "witnesses": [
        {
            "key": "VKey (VerKeyEd25519DSIGN \"19f61663433ebe8c46bed4b31e3f0f54130592ab4c757c7dd925f284149059c6\")",
            "signature": "SignedDSIGN (SigEd25519DSIGN \"716fb368ca0a196048e009be80a674214a9a3daad2c5ae2e9b35d90c1d45222bc1864415385a1e14480bfa0eec12d6ce433cbc834d9afaa4559be2ba82639408\")"
        }
    ]
}
Finally, we are able to submit the transaction to our local node.
cardano-cli conway transaction submit --tx-file tx.lock.signed --socket-path node.socket --testnet-magic 2Which should result in the message:
Transaction successfully submittedThe local cardano-node (opens in a new tab) you are running will validate your transaction against its current state before propagating it, so it's perfectly possible to experiment without putting funds at risk (actually, this is all on Preview anyway which does not use real Adas so there's no risk, but it's good practice to think about it anyway).
At this stage, your folder should looks roughly like this:
./hello_world
│
├── README.md
├── aiken.toml
├── plutus.json
├── generate-credentials.py
├── hello-world-lock.py
├── hello.script
├── hello.addr
├── me.addr
├── me.hash
├── me.sk
├── me.vk
├── tx.lock.raw
├── tx.lock.signed
├── lib
│   └── ...
└── validators
    └── hello-world.ak
Unlocking funds from the contract
Finally, as a last step: we now want to spend the UTxO that is locked by our
hello-world contract.
To be valid, our transaction must meet two conditions:
- it must provide "Hello, World!" as a redeemer; and
- it must be signed by the key referenced in the datum (i.e the owner).
Now, let's add the bits to unlock the funds in the contract. We'll need the
transaction identifier (i.e. Tx ID) of the locking transaction.
That transaction identifier (a.k.a. transaction hash), and the corresponding
output index (here, 0) uniquely identify the UTxO (Unspent Transaction
Output) in which the funds are currently locked. And that's the one we're about
to unlock. Since we know we have created a single UTxO, and transaction identifiers are uniquely derived from the transaction's content, we can simply compute this information locally:
cardano-cli conway transaction txid --tx-file tx.signedwhich let us infer the UTxO we are interested in is 9609c8dd442e3d72023e09790263210dfb203bdb2a38e0796382976818e52675#0.
We can also query the cardano-node (opens in a new tab) for UTxOs locked at specific addresses, which gives us:
cardano-cli conway query utxo --address $(cat hello.addr) --testnet-magic 2 --socket-path node.socket --output-jsonwhich would yield the following JSON structure:
{
    "9609c8dd442e3d72023e09790263210dfb203bdb2a38e0796382976818e52675#0": {
        "address": "addr_test1wqd988jgwwa5kjc2q4e03rrnrvqvlwz6c7wlyazymhd87mc2x3pjs",
        "datum": null,
        "inlineDatum": {
            "constructor": 0,
            "fields": [
                {
                    "bytes": "f45003ee43bd2590fb5380c2188b9cd7c49af894b83ad4606c575ba5"
                }
            ]
        },
        "inlineDatumRaw": "d8799f581c52ad33a108902a09926474a08bbd42bd8ab5155f3c007a6ff6747d37ff",
        "inlineDatumhash": "8a27f6e6fd3b1c07f86480306e3edfced1f799bea8c3215dd89eb16bbca386b0",
        "referenceScript": null,
        "value": {
            "lovelace": 1100000
        }
    }
}
Our validator's first requirement is a redeemer that contains the string Hello, World!, so let's construct the corresponding JSON file.
jq -c '{constructor:0,fields:[{bytes:.}]}' <<< "\"$(echo 'Hello, World!' | xxd -g1 | cut -d ' ' -f2-14 | tr -d ' ')\"" | tee redeemer.jsonthis will output the content of the redeemer.json file which should be
{"constructor":0,"fields":[{"bytes":"48656c6c6f2c20576f726c6421"}]}To build our unlocking transactions, we'll need the current protocol parameters extracted from the node:
cardano-cli conway query protocol-parameters --testnet-magic 1 --socket-path node.socket > pparams.jsonThe protocol parameters are indispensable for:
- computing the transaction fees,
- adding corresponding hash to the transaction for double-checking purpose and avoid
PPViewHashesDontMatcherror.
As we'll build our transaction without automatic balancing and fees computation, we need to compute in advance the execution units for running our validator. Luckily, aiken check always dump this information when running!
> aiken check
    Compiling pankzsoft/legal 0.0.0 (.)
    Compiling aiken-lang/stdlib v2.2.0 (./build/packages/aiken-lang-stdlib)
   Collecting all tests scenarios across all modules
      Testing ...

    ┍━ hello_world ━━━━━━━━━━━━━━━━━━━━━━━━━━━━━━━━━━━━━━━
    │ PASS [mem: 32451, cpu: 11921833] hello_world_example
    │ · with traces
    │ | redeemer: Hello, World!
    ┕━━━━━━━━━━━━━━━━━━━━━━━ 1 tests | 1 passed | 0 failed
At last we are able to build the unlocking transaction:
cardano-cli conway transaction build-raw \
  --tx-in 9609c8dd442e3d72023e09790263210dfb203bdb2a38e0796382976818e52675#1 \
  --tx-in 9609c8dd442e3d72023e09790263210dfb203bdb2a38e0796382976818e52675#0 \
  --tx-in-collateral 9609c8dd442e3d72023e09790263210dfb203bdb2a38e0796382976818e52675#1 \
  --tx-in-script-file hello.script \
  --tx-in-inline-datum-present \
  --tx-in-redeemer-file redeemer.json \
  --tx-in-execution-units '(12000000,34000)' \
  --tx-out $(cat me.addr)+856000000 \
  --fee 1000000 \
  --protocol-params-file pparams.json \
  --out-file tx.unlock.raw \
  --required-signer me.sk
We cannot use the build command here because it will try to evaluate
the script to compute the execution units and transaction fees, which
will fail because the transaction is not yet signed and therefore the
script will fail to check the transaction's signatories match its
datum.
The build-raw command does not automatically balance and compute the
transaction's fees, so we need to run it twice to adjust the --fee
parameter's value and the second output's value.
To compute the "exact" fees, run:
cardano-cli conway transaction calculate-min-fee --tx-body-file tx.unlock.raw --protocol-params-file pparams.json --witness-count 1which should output an amount in lovelaces, e.g 198028 Lovelace. Use this amount to adjust the change output's value and the --fee parameter to the build-raw command.
In some rare circumstances it's possible those adjustments yield a transaction that still does not have enough fees. In this case, recompute the fees from the adjusted transaction's body.
And we are now able to sign and submit our transaction:
cardano-cli conway transaction sign --tx-file tx.unlock.raw --out-file tx.unlock.signed --signing-key-file test.sk
cardano-cli conway transaction submit --tx-file tx.unlock.signed --socket-path node.socket --testnet-magic 2
And, tada 🎉!
We can check our transaction was successfully submitted and that it successfully executed our Hello World contract by querying the cardano-node (opens in a new tab) for the UTxO paying to our script's address:
cardano-cli conway query utxo --address $(cat hello.addr) --testnet-magic 2 --socket-path node.socket --output-jsonwhich should result in an empty output:
                           TxHash                                 TxIx        Amount
--------------------------------------------------------------------------------------