Hello, World! - with Mesh
Covered in this tutorial
- Interact with a validator on the
Previewnetwork; - Using Mesh (opens in a new tab) through Blockfrost (opens in a new tab);
- Getting test funds from the Cardano Faucet (opens in a new tab);
- Using web explorers such as CardanoScan (opens in a new tab).
Pre-requisites
We assume that you have followed the Hello, World!'s First steps and thus, have Aiken installed an ready-to-use. We will also use Mesh (opens in a new tab), so make sure you have your dev environment ready for some JavaScript!.
You can install Mesh (opens in a new tab) and setup the project as follows:
npm init -y
npm install @meshsdk/[email protected] tsx
Getting funds
For this tutorial, we will use the validator we built in First steps. Yet, before moving on, we'll need some funds, and a public/private key pair to hold them. We can generate a private key and an address using MeshWallet (opens in a new tab).
Let's write our first script as generate-credentials.ts:
import { MeshWallet } from "@meshsdk/core";
import fs from "node:fs";

async function main() {
  const secret_key = MeshWallet.brew(true) as string;

  fs.writeFileSync("me.sk", secret_key);

  const wallet = new MeshWallet({
    networkId: 0,
    key: {
      type: "root",
      bech32: secret_key,
    },
  });

  fs.writeFileSync("me.addr", (await wallet.getUnusedAddresses())[0]);
}

main();
You can run the instructions above via:
npx tsx generate-credentials.tsNow, we can head to the Cardano faucet (opens in a new tab) to get some funds on the preview network to our newly created address (inside me.addr).
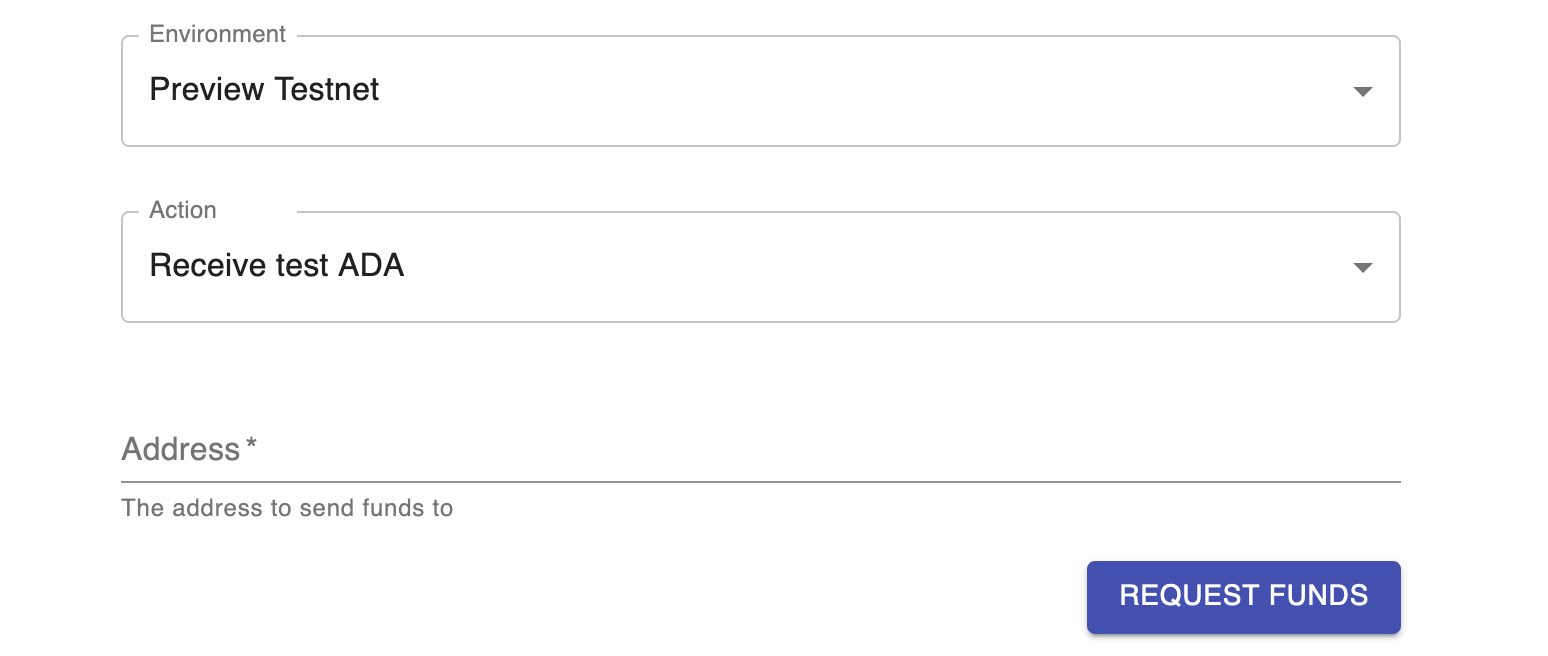
👉 Make sure to select "Preview Testnet" as network.
Using CardanoScan (opens in a new tab) we can watch for the faucet sending some ADA our way. This should be pretty fast (a couple of seconds).
Using the contract
Now that we have some funds, we can lock them in our newly created contract. We'll use Blockfrost Provider (opens in a new tab) to construct and submit our transaction through Blockfrost (opens in a new tab).
This is only one example of possible setup using tools we love. For more tools, make sure to check out the Cardano Developer Portal (opens in a new tab)!
Setup
First, we setup Mesh with Blockfrost as a provider. This will allow us to let Mesh handle transaction building for us, which includes managing changes. It also gives us a direct way to submit the transaction later on.
Create a file named common.ts in the root of your project and add the following code:
import fs from "node:fs";
import {
  BlockfrostProvider,
  MeshTxBuilder,
  MeshWallet,
  serializePlutusScript,
  UTxO,
} from "@meshsdk/core";
import { applyParamsToScript } from "@meshsdk/core-csl";

const projectId = process.env.BLOCKFROST_PROJECT_ID;
if (!projectId) {
  throw new Error("Missing BLOCKFROST_PROJECT_ID");
}

const blockchainProvider = new BlockfrostProvider(projectId);

// wallet for signing transactions
export const wallet = new MeshWallet({
  networkId: 0,
  fetcher: blockchainProvider,
  submitter: blockchainProvider,
  key: {
    type: "root",
    bech32: fs.readFileSync("me.sk").toString(),
  },
});Note that the setup above looks for an environment variable named BLOCKFROST_PROJECT_ID which its value must be set to your Blockfrost project id.
You can define a new environment variable in your terminal by running (in the same session you're also executing the script!):
export BLOCKFROST_PROJECT_ID=preview...Replace preview... with your actual project id.
Next, we'll need to read the validator from the blueprint (plutus.json) we generated earlier. We'll also need to convert it to a format that Mesh understands. This is done by serializing the validator and then converting it to a hexadecimal text string, we can do this by using the applyParamsToScript function.
import fs from "node:fs";
import {
  BlockfrostProvider,
  MeshTxBuilder,
  MeshWallet,
  serializePlutusScript,
  UTxO,
} from "@meshsdk/core";
import { applyParamsToScript } from "@meshsdk/core-csl";
import blueprint from "./plutus.json";

const projectId = process.env.BLOCKFROST_PROJECT_ID;
if (!projectId) {
  throw new Error("Missing BLOCKFROST_PROJECT_ID");
}

const blockchainProvider = new BlockfrostProvider(projectId);

// wallet for signing transactions
export const wallet = new MeshWallet({
  networkId: 0,
  fetcher: blockchainProvider,
  submitter: blockchainProvider,
  key: {
    type: "root",
    bech32: fs.readFileSync("me.sk").toString(),
  },
});

export function getScript() {
  const scriptCbor = applyParamsToScript(
    blueprint.validators[0].compiledCode,
    []
  );

  const scriptAddr = serializePlutusScript(
    { code: scriptCbor, version: "V3" },
  ).address;

  return { scriptCbor, scriptAddr };
}
Lastly, let's add 2 more useful functions to our common.ts file. One to get a transaction builder and another function to fetch a UTxO by transaction hash.
import fs from "node:fs";
import {
  BlockfrostProvider,
  MeshTxBuilder,
  MeshWallet,
  serializePlutusScript,
  UTxO,
} from "@meshsdk/core";
import { applyParamsToScript } from "@meshsdk/core-csl";
import blueprint from "./plutus.json";

const projectId = process.env.BLOCKFROST_PROJECT_ID;
if (!projectId) {
  throw new Error("Missing BLOCKFROST_PROJECT_ID");
}

const blockchainProvider = new BlockfrostProvider(projectId);

// wallet for signing transactions
export const wallet = new MeshWallet({
  networkId: 0,
  fetcher: blockchainProvider,
  submitter: blockchainProvider,
  key: {
    type: "root",
    bech32: fs.readFileSync("me.sk").toString(),
  },
});

export function getScript() {
  const scriptCbor = applyParamsToScript(
    blueprint.validators[0].compiledCode,
    []
  );

  const scriptAddr = serializePlutusScript(
    { code: scriptCbor, version: "V3" },
  ).address;

  return { scriptCbor, scriptAddr };
}

// reusable function to get a transaction builder
export function getTxBuilder() {
  return new MeshTxBuilder({
    fetcher: blockchainProvider,
    submitter: blockchainProvider,
  });
}

// reusable function to get a UTxO by transaction hash
export async function getUtxoByTxHash(txHash: string): Promise<UTxO> {
  const utxos = await blockchainProvider.fetchUTxOs(txHash);
  if (utxos.length === 0) {
    throw new Error("UTxO not found");
  }
  return utxos[0];
}
Locking funds into the contract
Now that we can read our validator, we can make our first transaction to lock funds into the contract. The datum must match the representation expected by the validator (and as specified in the blueprint), so this is a constructor with a single field that is a byte array.
As value for that byte array, we provide a hash digest of our public key (pubKeyHash) from the wallet created with our me.sk. This will be needed to unlock the funds.
import { Asset, deserializeAddress, mConStr0 } from "@meshsdk/core";
import { getScript, getTxBuilder, wallet } from "./common";

async function main() {
  // these are the assets we want to lock into the contract
  const assets: Asset[] = [
    {
      unit: "lovelace",
      quantity: "1000000",
    },
  ];

  // get utxo and wallet address
  const utxos = await wallet.getUtxos();
  const walletAddress = (await wallet.getUsedAddresses())[0];

  const { scriptAddr } = getScript();

  // hash of the public key of the wallet, to be used in the datum
  const signerHash = deserializeAddress(walletAddress).pubKeyHash;

  // build transaction with MeshTxBuilder
  const txBuilder = getTxBuilder();
  await txBuilder
    .txOut(scriptAddr, assets) // send assets to the script address
    .txOutDatumHashValue(mConStr0([signerHash])) // provide the datum where `"constructor": 0`
    .changeAddress(walletAddress) // send change back to the wallet address
    .selectUtxosFrom(utxos)
    .complete();
  const unsignedTx = txBuilder.txHex;

  const signedTx = await wallet.signTx(unsignedTx);
  const txHash = await wallet.submitTx(signedTx);
  console.log(`1 tADA locked into the contract at Tx ID: ${txHash}`);
}

main();
You can run the excerpt above by executing:
npx tsx lock.tsIf everything went well, you should see something like this:
1 tADA locked into the contract at Tx ID: 8559f57234407204d8e9a6bf57ef6943c65ec7119eb1c2ca6224f8bad8e71c1eInspecting the transaction
Now is a good moment to pause and have a look at CardanoScan. Here's an example of a Hello World transaction (opens in a new tab) that we generated using this tutorial.
If you notice the small icon next to the contract output address, we can even inspect the datum (opens in a new tab):
{
  "constructor": 0,
  "fields": [
    {
      "bytes": "4d871c3f74db9ea19e2ca678ac92672ada301a0d8ce2dc6091692a30"
    }
  ]
}
Unlocking funds from the contract
Finally, as a last step: we now want to spend the UTxO that is locked by our
hello-world contract.
To be valid, our transaction must meet two conditions:
- it must provide "Hello, World!" as a redeemer; and
- it must be signed by the key referenced as datum (i.e. the owner).
Let's make a new file hello-world-unlock.ts and copy over some of the boilerplate
from the first one.
import {
  deserializeAddress,
  mConStr0,
  stringToHex,
} from "@meshsdk/core";
import { getScript, getTxBuilder, getUtxoByTxHash, wallet } from "./common";

async function main() {
  // get utxo, collateral and address from wallet
  const utxos = await wallet.getUtxos();
  const walletAddress = (await wallet.getUsedAddresses())[0];
  const collateral = (await wallet.getCollateral())[0];

  const { scriptCbor } = getScript();

  // hash of the public key of the wallet, to be used in the datum
  const signerHash = deserializeAddress(walletAddress).pubKeyHash;
  // redeemer value to unlock the funds
  const message = "Hello, World!";

  // get the utxo from the script address of the locked funds
  const txHashFromDesposit = process.argv[2];
  const scriptUtxo = await getUtxoByTxHash(txHashFromDesposit);
}

main();
Now, let's add the bits to unlock the funds in the contract. We'll need the
transaction identifier (i.e. Tx ID) obtained when you ran the previous script
(hello-world-lock.ts)
That transaction identifier (a.k.a. transaction hash), and the corresponding
output index (here, 0) uniquely identify the UTxO (Unspent Transaction
Output) in which the funds are currently locked. And that's the one we're about
to unlock.
Note that we need to explicitly add a signer using .setRequiredSigners so that it
gets added to the extra_signatories of our transaction and becomes
accessible for our script.
import {
  deserializeAddress,
  mConStr0,
  stringToHex,
} from "@meshsdk/core";
import { getScript, getTxBuilder, getUtxoByTxHash, wallet } from "./common";

async function main() {
  // get utxo, collateral and address from wallet
  const utxos = await wallet.getUtxos();
  const walletAddress = (await wallet.getUsedAddresses())[0];
  const collateral = (await wallet.getCollateral())[0];

  const { scriptCbor } = getScript();

  // hash of the public key of the wallet, to be used in the datum
  const signerHash = deserializeAddress(walletAddress).pubKeyHash;
  // redeemer value to unlock the funds
  const message = "Hello, World!";

  // get the utxo from the script address of the locked funds
  const txHashFromDesposit = process.argv[2];
  const scriptUtxo = await getUtxoByTxHash(txHashFromDesposit);

    // build transaction with MeshTxBuilder
  const txBuilder = getTxBuilder();
  await txBuilder
    .spendingPlutusScript("V3") // we used plutus v3
    .txIn( // spend the utxo from the script address
      scriptUtxo.input.txHash,
      scriptUtxo.input.outputIndex,
      scriptUtxo.output.amount,
      scriptUtxo.output.address
    )
    .txInScript(scriptCbor)
    .txInRedeemerValue(mConStr0([stringToHex(message)])) // provide the required redeemer value `Hello, World!`
    .txInDatumValue(mConStr0([signerHash])) // only the owner of the wallet can unlock the funds
    .requiredSignerHash(signerHash)
    .changeAddress(walletAddress)
    .txInCollateral(
      collateral.input.txHash,
      collateral.input.outputIndex,
      collateral.output.amount,
      collateral.output.address
    )
    .selectUtxosFrom(utxos)
    .complete();
  const unsignedTx = txBuilder.txHex;

  const signedTx = await wallet.signTx(unsignedTx);
  const txHash = await wallet.submitTx(signedTx);
  console.log(`1 tADA unlocked from the contract at Tx ID: ${txHash}`);
}

main();
Run this script as usual, but this time, also passing the transaction id obtained from the previous command locking the funds. For example:
npx tsx unlock.ts 48b8178e3a8842227dfbb0f73669efc163f73fd7c8758b7dafc0a5a5f07a5445If everything worked as planned you should see something resembling the following output:
1 tADA unlocked from the contract at Tx ID: af3e7d83e5ee5324a612de9126636ef55505ffb9c468dacaf419635921b7a91cAnd, tada 🎉!
We can inspect our redeeming transaction on CardanoScan (opens in a new tab) and see that it successfully executed our Hello World contract.
You can find the full source code (opens in a new tab) for this tutorial on MeshJS's GitHub.